Sunday, August 23, 2015

Northumbrian Part 4

I finished up the border pattern on the tunic and painted the leather belts.  With that finished I was able to add his other equipment (minus the war horn).  Those pieces are just base coated at this point, but they will be the next things I work on.  I'm debating what I want to do for the shield color.  I've base coated the metal parts with Ritterlich Blue.  But the center section will have one main color or perhaps two with alternating sections.  I'll then go over that with another design based on the helmet.  So I'll probably work on other parts while I try to figure out my plans for the shield.

Here's a close up of how the pattern developed.  I started with the two border lines, measuring as I went to keep the spacing consistent.  I then went and added a bunch of guide dots (again measuring the keep the spacing consistent).  Now, I get on to doing the actual design.  By building it up in several stages, it will be easier to create a uniform looking pattern.  The first stage is a series of arrows or sideways v's going around the tunic.

Next I loop the ends of the v's around to form two leaf shapes.  Then I extend the base out to form more of an x.  And the final stage is to add the outside loops to connect up all the lines.  I was using a couple different colors as I went to give it some light-dark contrast.  But after the final stage I went in with some glazes to further develop the shadows and tie it all together.

Thursday, August 13, 2015

Northumbrian Part 3

I spent the past two evenings working on the tunic for the Northumbrian figure.  I opted for a blue fabric to fit the cold theme for the piece.  Normally I'd pair blue with something like a dark burgundy wine to create more interesting shadows.... but that would warm them up more than I want.  So instead I stuck with just a regular dark blue, Reaper's Ritterlich Blue, for the shadows.  The midtone and highlight was a mix of Heather Blue and Dark Elf Highlight (2 parts blue to 1 part dark elf or maybe 3 parts blue to 2 parts dark elf).  I also mixed in a bit of Ghost White for the top highlights.  This was used more on the upper part of the figure than the lower.

You'll notice the armor on his back is very very dark and dull.  The shield will eventually be placed on his back, so all of that area will be in shadow.

If you're wondering what's going on with the dots, they are guide marks for the border pattern I'm creating.  I began with a thin line along the bottom edge.  I then marked the height of the pattern on a stick and used that to place marks so the spacing on the top line will be even.  There's a lot more to the pattern, so it will take some time to finish.  My plan is to use the pattern from the nose guard of the Coppergate helmet (which this figure's helmet is based on) and adapt that to create the pattern for the tunic.  I'll also be using the design work on the helmet as inspiration for the shield design.


Wednesday, August 12, 2015

New Figures and a New Toy

Instead of sharing my work, I wanted to post about a few new releases on the market that people may not be aware of.  The first is from Arena Rex.  You may remember me posting about their figures and kickstater.  Their figures are nicely detailed resin kits that fit into this interesting mash up of history and fantasy.  Their kickstarter has finished delivery and all of their figures are now available on their 
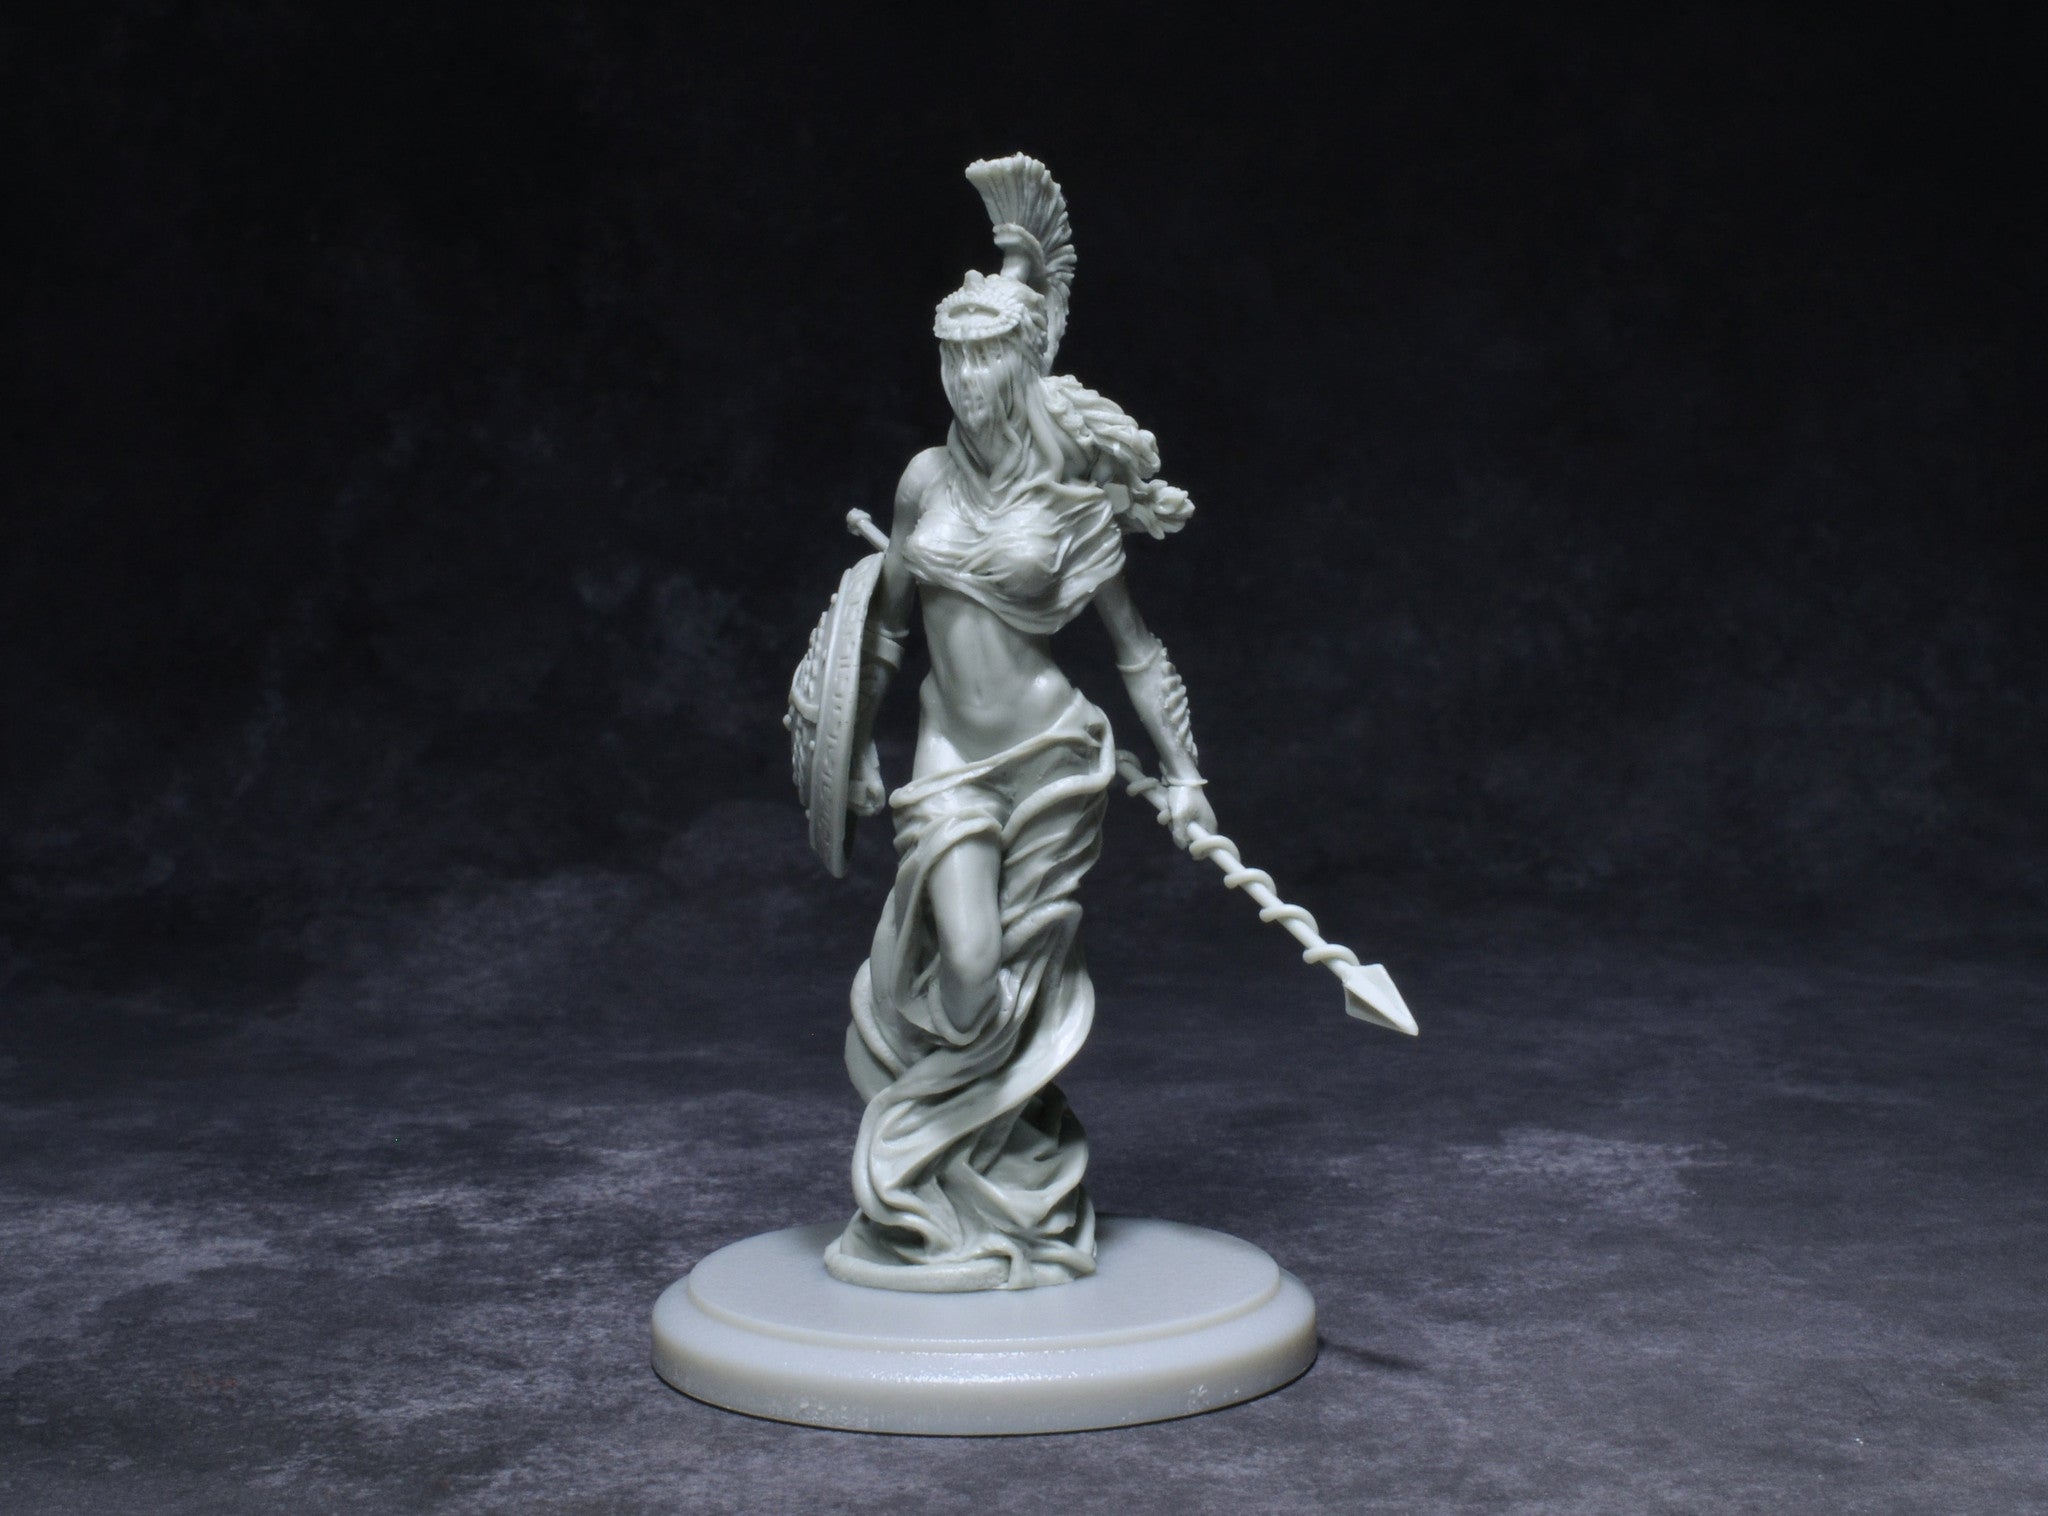
webstore.  They just released a new figure and it's a real beauty.  The figure, pictured below, is Medusa (though a prettier version than most of us are used to).  She does have snakes mixed in with her hair and at least one mixed in with the cloth around her lower body.  Other than that, she looks like a regular human (well, regular supermodel version of a human).  Her face is covered in a shroud and would be an excellent chance to work on painting sheer fabric.  Their normal figures are 35mm scale but, as a mythic creature, this one is closer to 54mm (the base is 40mm in diameter).  A really stunning sculpt.  I'm really looking forward to getting to paint this one!

Pegaso is releasing a number of 90mm scale mini busts.  Most of the busts we see on the market are 150mm to 200mm scale, so these will be about half that size.  Basically, what they're doing is converting several of their existing 90mm full body figures into busts.  These are not posted to their website yet, but should be up there soon.  So far they are releasing four: a Mamelouk, a French Napoleonic drummer, a Delaware Indian, and a Roman Signifier.  However, if these sell well, I'd expect to see them convert more of their 90mm figures into mini busts.

Above is one of these new mini busts and below is the 90mm full figure.  As you can see, no changes to the sculpt, just cutting it down to create the smaller bust.  It's an interesting idea and, if you're used to painting smaller figures, would be an easier transition than going directly up to the 200mm scale busts.

I've talked a lot about the Scale75 Metal 'n Alchemy paint sets.  In my opinion they are the best water based metallic paints on the market.  However, the main drawback was they were only available in sets.  So if you wanted one then you had to buy the whole set.  Well, Scale75 has finally made them available for individual purchase.  Right now you can get them through Scale75's main site.  The individual metal paints aren't available on the US site, but I'd expect them to be up there shortly.  Oh, and right now the US site is offering 15% off for the entire month of August.  So if you were thinking about any of their figures or paint sets, now is a great time to get them!

Finally, I wanted to share a new toy I just picked up.  I've been taking part in painting/hobby hangouts on google chat and for a while I've been wanting a better webcam.  I was using a basic cheap-o webcam and, while fine for things like video chat, it could not focus on small things like the figures so no one could actually see what I was working on.  Well, on the recommendation of Shades, I picked up the Ipevo VZ-1 HD camera.  It arrived yesterday and I set it up for a quick test.  Below is a screen capture with the camera.  The setup for the picture isn't the best (the lighting is a bit harsh and the angle is very low so reflections off the metallic sections is a bit off), but the camera does a really nice job of focusing on the figure and capturing the detail.  I still want to play around with the settings and setup, but I'm very pleased with it's capabilities so far.  And, who knows, maybe I'll even start to use it to create some video tutorials!  No immediate plans to make any, but I will keep you all posted.

Wednesday, August 5, 2015

Northumbrian Part 2

I've finished up the armor on the Northumbrian figure.  The detail on the chain mail sculpt is really fine on this figure.  Probably a lot more realistic than the mail we normally see on figures, but it's also a bigger pain to paint.  Basic dry brushing wasn't going to cut it, so there was a lot of going in and adding tiny dots of paint.

Here's a closer look at how I did the helmet (the idea is the same for the armor).  I started with a dark base (Ritterlich Blue for the iron and Burgundy Wine for the bronze) as seen in my previous post.  On top of that I started with a dark metal coat.  I used Scale75's Black Metal and mixed that with Pure Black and Ritterlich Blue.  It was roughly equal parts of Pure Black and Black Metal, then about a third the amount of Ritterlich Blue.  The image on the left shows the helmet with just the dark metallic tone.

From there I started to mix in a lighter metallic tone, Scale75's Heavy Metal.  Bit by bit I worked up to pure Heavy Metal.  I focused on the normal areas you'd hit for zenithal lighting and then hit the edges as well.  I used a little bit of Speed Metal for the top highlights.  I also used a bit of black lining to bring out the borders between the plates of the helmet.  I used the same approach with the yellow metal on the helmet.  The middle image shows it at this state.

The final step was to go in with some blue, purple, and black glazes.  These were used to tint the armor and further develop the shadows.  The effect is subtle but you can see it if you compare the middle and right images.  If needed I may go back in a redo a few of the highlights at this final stage as well.

Sunday, August 2, 2015

Update on Competitions and New Figure

Wow, I can't believe it's been almost a month since I last posted here.  Before I get to my latest project I've got some contest results to update everyone on.  I took Sorondil along with a few other figures to the Bay Area Open last month.  Sorondil came in 2nd for the people's choice and my Officer of the Guide was selected as the Crystal Brush qualifier winner!  Demihuman's entry took best in show and won people's choice as well, so way to go Ben!

A few months ago I submitted an entry to MassiveVoodoo's Bananalicious contest.  They announced the winners and I was completely shocked to see I got first place in the Historical Masters category.  I saw the other entries and honestly thought, well, if I get really really lucky maybe I could end up with a third place finish.  So I have no idea how I ended up the top spot but who am I to complain?  I really admire the guys behind MassiveVoodoo and I've picked up tons of useful info form their site, so I feel so proud that they liked my work.

Okay, on to what's next.  I've got some big projects planned in the near future, but with all the prep involved I wanted to start on something relatively quick.  I chose the Northumbrian Warrior from Latorre.  He's not too complicated, but I'm making some minor tweaks to the sculpt.  I'm also attempting to use color to capture a cold feel for the piece.  I plan to do a snow covered base, but I want to make use of cool colors to reinforce that feel.  It seems simple, but will require me to adjust a lot of my normal shadow and highlight mixes enough to push me out of my comfort zone.

Here's a quick look at the bare figure.  I used one of the etch master belts and will sling his shield over his back.  I wanted to put something in his right hand, so I looked around the bit box.  I thought about giving him another weapon but decided to give him a war horn instead.
 

After a quick base coat I went to work on the face.  I took a good deal of time trying to figure out how to adjust my skin mixes for the feel I wanted.  In the end I used my regular mix (Mahogany Brown, Chestnut Brown, Rosy Shadow, Fair Skin, Fair Highlight) and mixed in a little Ritterlich blue into the shadows.  I then used some of the Scale75 inks (red, blue, and purple).  I went heavier with the blues and purples than I normally would.  I also tried to exaggerate the red in the cheeks and nose.
 

Here's a closer look at the face.  I left the nose guard off while I painted the face (made that a lot easier).  Another change was my base for the metallics.  Normally I use a dark brown, but I decided to switch it up with Ritterlich blue.  Probably not going to make a big difference, but it a hint of it shows through then hopefully it will help.