Thursday, May 31, 2018

Knight Part 11

I needed a break from the tiefling.  It reached a stage where, though I really like the figure, I also kind of hate it.  Just feels like a slog to make any progress.  At those times, it's best to set it aside and work on something else.  So, as I peered around my painting station, I realized my crusader has been almost complete for a few months now but I hadn't actually put on the finishing touches.  No reason to delay it any longer, let's get him finished!

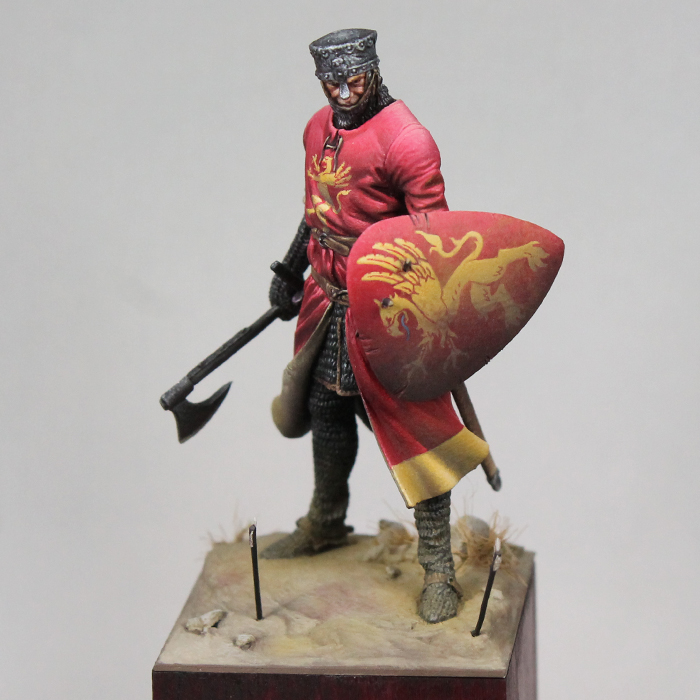
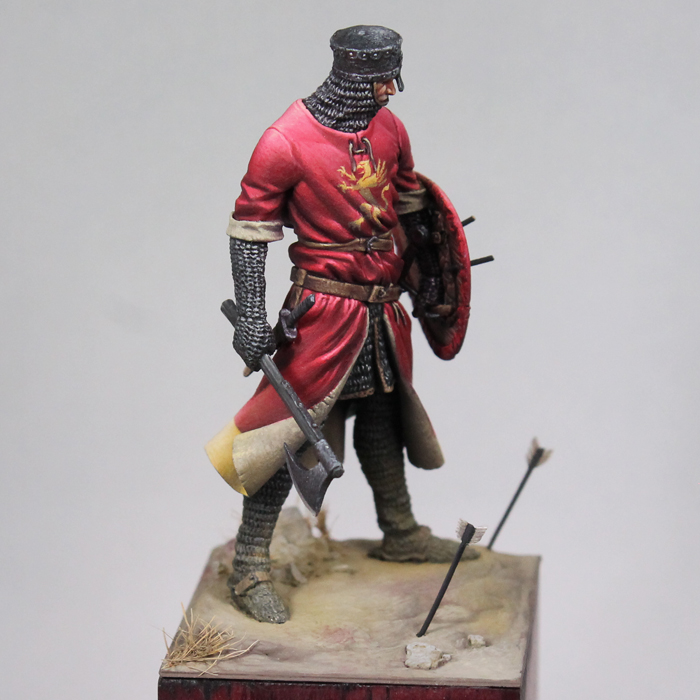
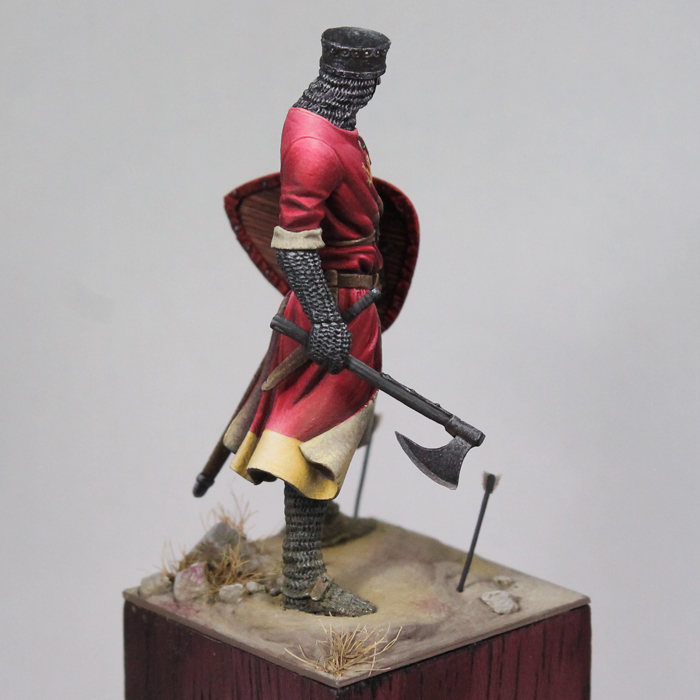
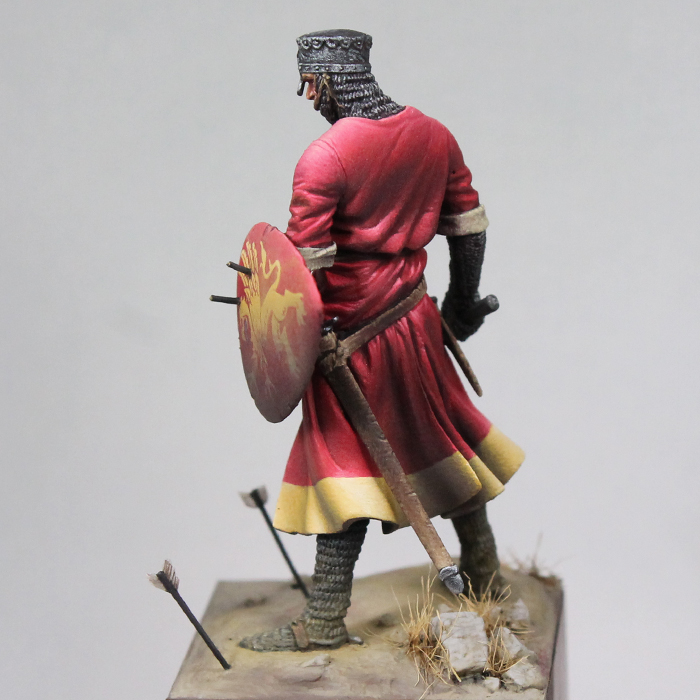
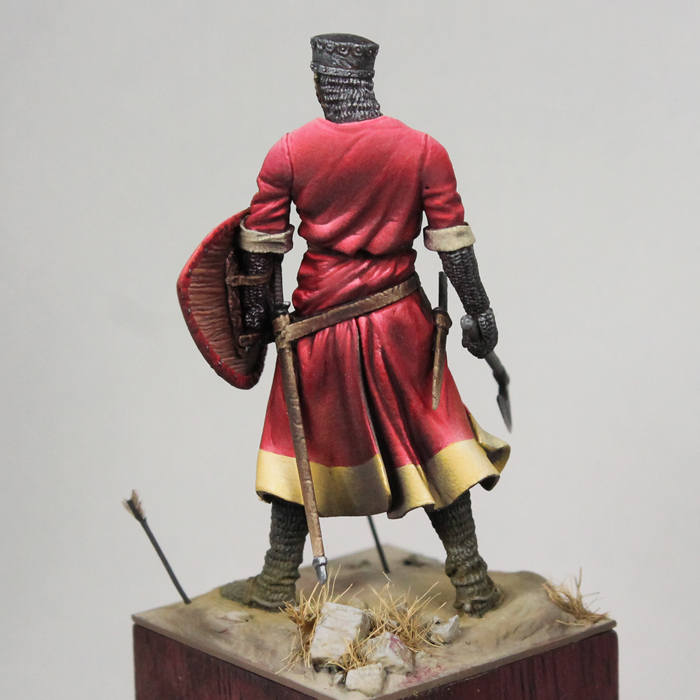
I had a few minor spots to paint (arrow shafts, dagger hilt, and a couple touch ups on his surcoat).  After that I started weathering him.  The scene is right at the start of a battle.  I picture him standing outside of Acre or some other fortress and the defenders have just shot their first volley of arrows.  Now the knight stands there looking back as if to say 'is that the best you can do?'  Why is that important?  Well the weathering is telling his story.  If he's at the end of a battle, he might be covered with blood splatter.  At the very least you'd expect some on his axe and shield.  But at the start, not so much.  I did add some faded blood stains though.  There's one on his shield (it's subtle, but there) and some on the ground and rocks (this is land that's been fought on again and again).

Next I went about adding dirt and dust.  This is a pretty dry climate, so no mud caked on his feet and legs.  I just used dry pigments to add a fine layer of dirt on him.  I focused on the shield and his legs.  I didn't want to overdo it on his surcoat, so I left that pretty clean.  Likely it'd be dirty too, but I'm taking some artistic license. ;)  And with that, he's done!  Here's how the final piece turned out...


Tuesday, May 29, 2018

Mollymauk Part 4

I was out of town for a few weeks, so I had to put this project on hold.  But now that I'm back, I've started working on the next big task, his coat.  Following the character art, this will be covered in designs.  Since most of those designs are made up of lines (rather than large solid areas), it made the most sense to paint and shade the background color fully before adding the design details.  The only exception was a large thick stripe down the center of his back.  That was done prior to shading/highlighting the red.

Since I was dealing with a large area, I began by sketching in the shading.  I used 5 color mixes: the shadow, midtone, and highlight along with colors halfway between each of those).  I then returned to this roughed in version and could focus on blending between the colors.  I used my typical layering approach, but just focused in the area where those shades would be.  This saves time by not repeatedly painting over the same spot with shades that would just get covered up later.

After that was done, I started layering on the designs.  The coat will be covered with them, so I still have a way to go.  I started with the main elements.  Their size and placement will affect how the rest is done.  I'll likely find some details won't quite fit, so I can either simplify or squeeze out some of the smaller bits.  Here's a look at how he's coming along...


Here's a quick look at how the some of the design work was done.  It's my usual process for geometric designs.  I started by taking a scrap of paper and marking the distance from the center of the circle to the outside and then a second mark for the distance to the end of the arm (triangle).  I placed a dot for the center of the circle and then held the paper at different angles to mark dots along the outside of the circle and at the end of each arm.  Instead of trying to freehand a circle, I could follow the dots to keep it much closer to a true circle than if I'd just eyeballed it.  I then went about thickening up that line (first image below).  Next I painted on radial lines for the arms.  Then I went about placing more guide marks around the circle, two evenly spaced between each arm.  These were close enough that I did just eyeball it (though if you wanted to be real precise you could measure that too).  Then I painted in the lines connecting these marks with the ends of the arms (image 2 and 3).
Next I had to add the squiggly triangles in between.  I started with a short line between each triangle, done at a slight angle (image 4).  Then I went back with a stretched 'C' shape (image 5).  Finally I painted the lines on either side, letting the existing curve help be my guide (image 6).

With all these sorts of designs, it's about breaking it down into simpler parts and slowly building up the complexity.  By also measuring, you keep distances consistent and get something that looks more like it was printed on and not hand painted.