Showing posts with label Latorre. Show all posts

Thursday, March 29, 2018

Lozza Part 2

I've begun to convert the bike.  Not a ton of progress, but it's starting to take on a new look which makes me happy.  I stretched the front end for a chopper style bike by clipping and replacing sections of the fork. I also took some wire and added the brake line to the front wheel.  Once I attach the front to the rest of the bike, I'll add in some more cables to the engine and rear wheel.  It's a relatively simple model kit, so I feel like adding those details really takes it up a level.

Still debating what to do next.  While the elongated front feels sleek and fast to me, I'm thinking I'll add some armor to the back and beef it up.  Make the rear a little more tank-like.


Tuesday, March 27, 2018

Lozza Part 1

While I continue to work on Brom, I'm starting to prep a future project, Lozza from Latorre.  He's a 75mm scale fantasy figure, but when I first saw a WIP image of the sculpt on Facebook it made me think of a post-apocalyptic figure, something from the world of Mad Max.  I was still inspired by that interpretation, and I haven't done much of anything in that genre, so I want to still take the figure in that direction.  In general, I think the final version still works, though I plan to do some minor conversion work to the figure.  The first thing I wanted to do was remove two plates hanging from his right side.  I don't know what they're meant to be, what they're supposed to be made out of, or what their purpose is.  All I can say is they look like 'fantasy stuff.'  Even if I were to do this as a fantasy piece, those sections would bother me.  If I can't figure out what they're supposed to be, how am I going to paint them?  So, last night I went to work on the figure with some clippers and a hobby knife to remove them.  I then tried to carve and file the resin to make new surface look like a continuation of the wrapping around his waist.  I also had to put in a continuation of the belt.  I might tweak it a bit more, but overall I think I'm happy with how it turned out.


I could also put a pouch or something hanging from his belt to cover up that section... but I think it turned out well enough that I don't need to do that.

The next bit of converting will be on his head.  There's a strap for a mask which you can see on the top image.  I'm going to leave the strap, but on the front I'm going to create a pair of goggles.  That's all I have planned for the figure at the moment.  Maybe I'll come up with some other stuff I want to add, but for the time being I'm turning my attention to the rest of the scene.

I picked up some stuff along the way.  Since I was thinking Mad Max, I wanted to include a vehicle.  Since he's 75mm, a car would make the scene pretty damn big!  I could do just part of a car (with the rest of the base so not included), but that seemed challenging and possibly unsatisfying (like the viewer might expect to see the whole thing).  So instead I thought what about a motorcycle?  It fits the Mad Max world and is small enough that it won't need a huge scene or dominate the base.  I did some searching and was surprised how hard it was to find a motorcycle in 1:24 scale.  I finally found a simple kit for a dirt bike.  Not the most detailed model, but it'll work.  Plus I plan to do a lot of converting work on it... redo the front to extend the poles and move the wheel farther forward and add all sort of accessories to the back (packs, trophies, gun holster, etc).  Lots of good Mad Max reference images online, so I'll be checking out the vehicles for inspiration.  At the moment I'm looking for some other 75mm bits that could work.  From the Aradia kickstarter I got a pile of skulls and I think they could work well in the scene.  At the moment I have a vague idea of what I want to do, but am still trying to get a clearer picture and nail down the details of the base.  Aside from the figure and the bike, the rest is up in the air.  But that's okay.  I've got time, other figures I'm working on.  This is a project I've wanted to do for a while, so I want to go slow and make sure that the scene will live up to my hopes for the piece.  I just wanted to share this early look at it and give you a peak at what I've got in the works.

Wednesday, March 23, 2016

Samurai Part 14 and a few other announcements

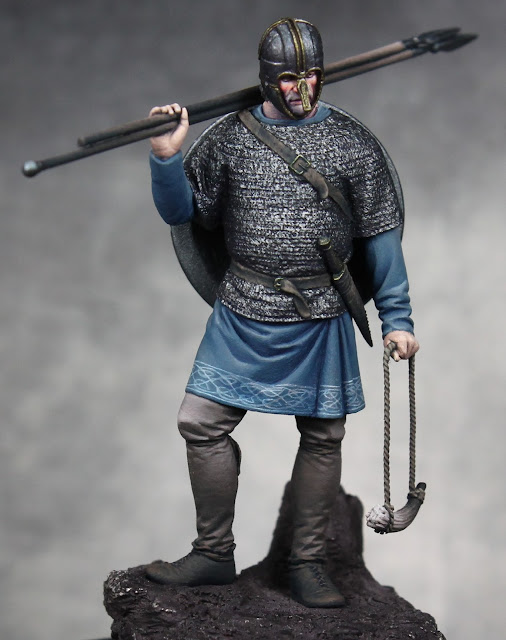
With about a week left until Crystal Brush, I've just about finished the samurai... at least the figure itself.  I've still got to paint the shoes and touch up the arrow heads in the quiver, but the figure is essentially finished.  The base is another matter.  It's been built, but the painting is just beginning.  I'm a bit stressed out by how little time there is to finish it, but I'll find some way to get it done to a level I'm happy with.  I'm going to save the truly finished photos for after the Crystal Brush, so these will be the last ones I post for another week and a half.

I've also put the finishing touches on the Northumbrian.  Like the samurai, I'm saving the final pictures for after the show... but I thought I'd still post something.  Here's a look at the figure from the back.  You can see the final weathering on the shield (including the scratches added to the metallic parts) and the snow effects on the base.

In other news, I wanted to remind everyone that there is an online voting component for the Crystal Brush.  Half the score is decided by the onsite judges and half by online votes over at CoolMiniOrNot.  You have to have an account there to vote, but it's free to create one.  Voting will take place Saturday, April 2nd (starting around 3 pm central time) and Sunday, April 3rd (ending at noon central time).  There should be a lot of amazing figures up in the gallery.  Artists like Ben Komets, Kirill Kanaev, Karol Rudyk, Aaron Lovejoy, Jessica Rich, and many others will be submitting entries.  Voting is the normal 1-10 scale, so take a look and rate the pieces what you think they deserve.

Finally, for anyone in or near the Southern California area, our local modeling club is putting on a show next month.  Come check it out!  There are categories for historical as well as sci-fi and fantasy figures.  Judging is on the open or merit system, so you're competing against a standard rather than against each other.  So even if you're not a pro, your work can still be recognized!

Thursday, March 17, 2016

Northumbrian Part 8

Been pretty quite here this month.  I've been fighting off a cold and was away from home last weekend.  Hopefully this weekend will be nice and quiet and I can try to finish up the samurai figure.  In the meantime, I decided to do a little work on the Northumbrian.  I haven't touched this guy since September, but I'm planning to use his as my entry for Historical Single Figure at the Crystal Brush competition so I need to get him wrapped up.  All I've got left to do on this one is paint the base and do a few final touches (weathering) to the figure.

I took the base that came with the figure and extended the groundwork out to the edges of the wood plinth.  I used the same colors from the figure (browns, grays, and blues) to paint the base so it kept the muted feel of the rest of the piece.  I plan on making this a winter snow covered scene, so I did not worry too much about the dirt.  I still needed to paint it and the rocks since, until I actually put down the snow, I'm not sure what might show through.  I probably spent the most time on the tree stump as that will definitely be above the snow.  I also added some dead leaves and yellow grass.  I'll use some pigments on the grass so it's not all so one note with the color.  Again, most of that will be covered by snow, but some may stick through and make the scene look more interesting.

I want to do a little more painting on the shield and then weather the figure (and base) with pigments.  Once that's done I'll go about adding the snow.


Saturday, December 26, 2015

Barbarela Part 6

Happy holidays, everyone!

During the long weekend, I've had some hobby time.  One thing that bugged me about this figure was the sword.  It's got barnacles sculpted onto it (which, as a fantasy figure, is fine), but the rest of the surface is pretty normal.  Seems to me, if it's got barnacles growing on it, there would be a lot more corrosion going on.  I'd prefer either a smooth sword or one really crusty.  So, I decided to give it a little more texture.  I used a technique Sproket (David Soper) has used on Nurgle figures.  Baking soda is mixed with the base color and matte varnish to form a paste, then applied to the figure.  The base color is just there to speed up the painting, but the matte varnish is important to hold on the baking soda.  It gives a pretty secure bond when dry.

With the texture added to the sword, I went in with some stippling to further exaggerate the effect.  I left some exposed portions as still metal.

Since the figure is almost complete, I went back to work on the base.  The main structure was previously built using balsa wood.  To match the sword, I decided to add some texture to the side.  I used pro-create (grey stuff) to create some barnacles there as well.  Then I used the same baking soda + matte varnish technique to fill in the spaces around the barnacles.  I also added some rope and a portion of the rigging.  This was done using string.  I used superglue to coat the strings and lock them in the desired shape.  A bit of regular superglue can be helpful in attaching specific spots, but mostly I used thin super glue.  This quickly soaks into the string and is really useful for fixing large sections.  You've just got to be careful since it can get all over the place and you don't want to touch the strings as they'll be coated in glue.  Needless to say, I got a lot on my hands and there were numerous times I almost glued the myself to the base!


Sunday, December 20, 2015

Barbarela Part 5

I've had a bit of painting time this past week, but it's been spent on small sections.  With the other hand attached, I finished off the sleeve and then painted the hand itself.  I used the same pale sickly skin mix I did for the face.  I then moved on to the beard and, with that finished, applied some glazes to the face.  Now, normally I use red, blue, and purple ink for this work.  Since I'm tweaking the skin tone for a less natural look, I changed the glazes as well.  The mixes were shifted towards the blue.  So, red became two parts red to one part purple.  Purple became 50/50 purple and blue.  The blue glaze remained blue.


Sunday, December 13, 2015

Barbarela Part 4

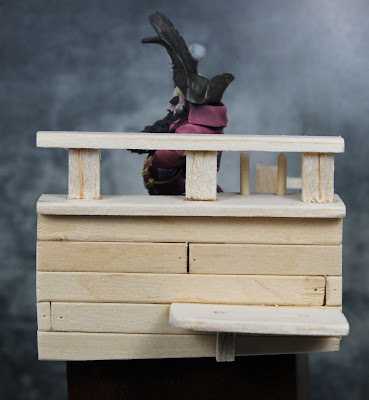
Well, I didn't do much painting this weekend but I did spend some time building the base for the dwarf pirate.  I used balsa wood to create a section of a pirate ship.  Thanks to some helpful internet searches, I think I creating something reasonably close to what a section of a real ship should look like.  I plan to add more details like ropes before I'm done.  I intentionally angled the deck as a ship would be constantly rocking from the waves and the angle makes a more interesting scene anyway.  Also, now that I have the ground where the dwarf will be standing, I was able to add his sword (so I could make sure it and his feet would all rest on the base).


Thursday, December 10, 2015

Barbarela Part 3

I've made some moderate progress on the dwarf.  I finished off the pants.  They still needed some shading on the blue sections and more highlighting all around.  For the blue I used Reaper's Heather Blue as the base, Midnight Blue to shade, and Ashen Blue and then a bit of Vampiric Shadow to highlight.

After that I worked on some details.  I took care of his peg leg, his pistol and belt buckle.  I also painted his left hand.  An errant brush stroke left some skin tone on his coat.  But, it gave me the chance to fix a few other issues in the coat that had been bothering me.  There was a line in the front (lower left) that didn't sit right with me, so I worked that out.  There were also some shadows on his left arm I felt were too dark, so I lightened them up a bit too.

Sunday, December 6, 2015

Barbarela Part 2

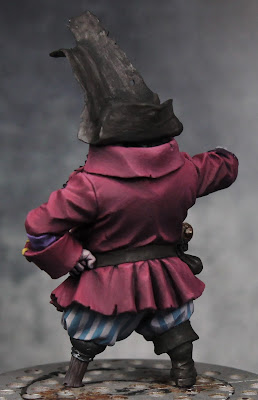
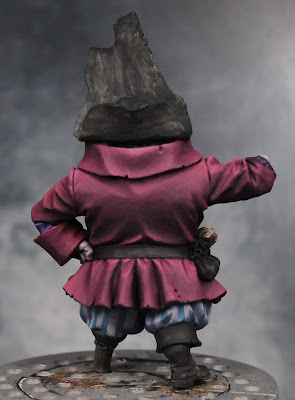
More progress on the dwarf pirate. I finished off the red on his coat.  I didn't want a bright red, so for the mid tone I used a 3 to 2 mix of Violet Red and Dark Elf Highlight (a grey).  The shadows were Burgundy Wine and the highlights were a mix of Fire Red, Dark Elf Highlight, and Vampiric Shadow (roughly 50/25/25).  I added a bit more Vampiric Shadow for the final highlights.

I've started to do some of the shading and blending on the pants, but they are still a work in progress.

Wednesday, December 2, 2015

Barbarela Part 1

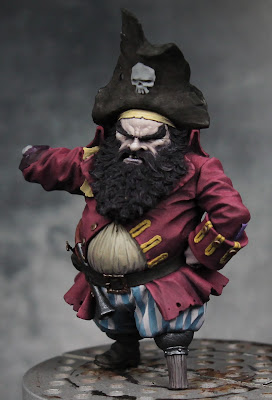
I needed a break from the samurai, so I decided to start on this little figure from M Proyec.  He's a dwarf pirate at 1/35 scale so only around 45mm.  This is still at the very early stages.  The face hasn't gotten the glazes yet, the coat is shaded but not highlighted (and the bottom isn't even shaded), and the stripes on the pants are just sketched in.  But you get an idea of the colors and where this is headed.  It's a challenging piece.  The face is one of the trickier ones I've tried to paint.  He's got exaggerated features and small eyes that are almost completely hidden by the protruding brows.


Thursday, September 17, 2015

Northumbrian Part 7

Just a little bit of progress to share.  I did some minor tweaks to the horn and rope.  I also applied some glazes to the hands.  A bit of pink to warm up the knuckles and the right palm, then some bluish purple to cool down the shadows.


I think I've finally settled on a shield design that I'm happy with.  Thanks to a suggestion from Maenas over at CMoN, I'm doing the celtic pattern radially on the shield.  This will add that extra detail I was looking for without fighting against the existing pattern on the shield.  I haven't decided if I'll do it on all the dark sections.  I'm going to start with four and see how it looks, then decide whether or not to do the rest.
 When I finish the design, I'll do some glazing to blend it in and reinforce the shadows.  After that I'll add chipping and general weathering to the shield.

With this figure almost finished, it's time to start prepping the next project.  I've gone back and forth a lot on what I want to use as my 'big' project for Crystal Brush, but right now I'm leaning heavily towards a 90mm samurai archer from Pegaso.  It's a beautiful piece with a lot of opportunities to work with freehand designs and plenty of color.  This will definitely be a multi stage project.  I've assembly most of the body but, because of the design work I'll have to do on the clothing, most of the armor panels will need to be attached later.  There's also a bunch of equipment that will go on over those (sword, quiver, etc) but that will have to wait until after I do the detailing on the armor.  Definitely a big project and one that has a lot of potential, but also one that is going to take a lot of time.  I'd love to get in done in time for the contest but no promises yet.  We'll see how it goes.  Anyway, here's a look at the figure partially assembled.  I included the Northumbrian for a sense of scale.  It's definitely a big jump going from 54mm to 90mm.


Quick update on the shield...


Sunday, September 13, 2015

Northumbrian Part 6

Made a bit more progress on the Northumbrian figure.  I finished up some detailing on his legs (the straps and shoes.  Then I turned to the shield.  Last time I'd only roughed in the basic colors.  Now I've cleaned up and shaded the alternating blue sections.  I had this whole thing planned out... but now I'm starting to rethink that.  My original idea was to do a white circular design on top of the alternating blue sections.  It would be similar to the one on the tunic, but ending in a pair of serpent or dragon heads (based on the helmet metal work).  However, now I'm starting to worry if the shield will be too busy with that design there.  I'd still like to do something... but I'm not sure what.

So, while I weight my options, I decided to add the final piece to the figure, the horn in his left hand.  This was a piece from my bits box that I thought would be an interesting addition to this scene.  Once I make a decision on the shield, I'll finish that up and then start weathering the figure before finally getting started on the winter base.

\

Monday, September 7, 2015

Northumbrian Part 5

After finishing up his tunic, I turned to his accessories.  I was still undecided on my plan for the shield, so I started with his spears.  I wanted to do a dull brown, so the shadow is a mix of Ritterlich Blue and Brown Liner.  Then the midtone is a mix of Basic Dirt and Dusky Skin to take it into more of a brown grey.  The highlight is that mixed with Vampiric Shadow.  Since they're basically just horizontal cylinders the normal shading isn't that interesting.  So I put in a gradient getting lighter towards the tips for a little more interest.

The hands were next.  As with the face I mixed in a bit of Ritterlich Blue to the Chestnut Brown and Rosy Shadow mix.  Normally I'd go from there up to pure Rosy Shadow and then mix in Fair Skin for the highlight.  In this case, I went to maybe 70/30 Rosy Shadow and Chestnut Brown (+ blue) and then started to mix in Fair Skin.  I wanted to keep the hands a bit paler and not as pink.  I still need to go in with glazes, but these I'll keep to purple and blue.

I approached the pants the same way as the tunic.  I used a lot of the same colors to help tie it all together.  The shadow tones are 50/50 Brown Liner and Ritterlich Blue (which has been used in numerous places).  The midtone is 50/25/25 Basic Dirt, Dark Elf Skin, and Heather Blue.  The highlight is 50/50 Vampiric Skin and Dark Elf Highlight with just a touch of Basic Dirt mixed in.

I did base coat the shield, but nothing beyond that.  I decided to do the alternating sections in light and dark blues (rather than introducing a new color).  On top of that I will do some sort of design too.  The outer section of the shield and the middle will be metal, I've just laid down a dark blue to work over.  Jason Martin has been working on the same figure and posted a nice shield step by step, so I'm planning to refer to that as I go.


Sunday, August 23, 2015

Northumbrian Part 4

I finished up the border pattern on the tunic and painted the leather belts.  With that finished I was able to add his other equipment (minus the war horn).  Those pieces are just base coated at this point, but they will be the next things I work on.  I'm debating what I want to do for the shield color.  I've base coated the metal parts with Ritterlich Blue.  But the center section will have one main color or perhaps two with alternating sections.  I'll then go over that with another design based on the helmet.  So I'll probably work on other parts while I try to figure out my plans for the shield.

Here's a close up of how the pattern developed.  I started with the two border lines, measuring as I went to keep the spacing consistent.  I then went and added a bunch of guide dots (again measuring the keep the spacing consistent).  Now, I get on to doing the actual design.  By building it up in several stages, it will be easier to create a uniform looking pattern.  The first stage is a series of arrows or sideways v's going around the tunic.

Next I loop the ends of the v's around to form two leaf shapes.  Then I extend the base out to form more of an x.  And the final stage is to add the outside loops to connect up all the lines.  I was using a couple different colors as I went to give it some light-dark contrast.  But after the final stage I went in with some glazes to further develop the shadows and tie it all together.