
I was recently asked about my photo setup. I know a lot of people have trouble photographing their figures but it's not nearly as tough as you think. With a decent photo setup you can get good photos even with a cellphone camera. And if you're posting your figures online then nice photos can make a big difference in how they are received. What follows is a description of how I do my photos along with pictures of my setup. Aside from the camera (and you really don't need a fancy one), the whole setup cost me $10 or $12. If you have to buy the lamps (though I'm guessing you're already using some to paint with) then up that to $20-30. Still, not a big investment if you're active in the online community.
First you'll need some sort of light box or diffuser to soften the lights. Otherwise you can get some really harsh glares and reflections. This can be as simple as taping a white piece of paper over the light (careful it's not touching or could be a fire hazard) or as complicated as buying an fancy light box. I went with a low tech solution following this article at MassiveVoodoo
In it they show you how to turn a $3 plastic trashcan from Ikea into a lightbox. It works surprisingly well and is a cheap easy solution. The size works well for 28mm to probably 75mm figures and busts. 90mm might be a little too big and doubtful those garage kits will fit, so you may need to come up with another solution if you're trying to photograph something on that scale.
You'll also want to get some sort of photo background.
Hanger 18 makes some really nice photo backdrops but I went the cheap route and grabbed mine for free off MassiveVoodoo. All you need is a color printer and then a little sticky tack to hold it on the back of the lightbox.
For my lights I just use the same lights I paint with. They are two swivel lights also from Ikea and I've installed daylight bulbs in each (13W). The daylight bulbs mean I don't have any issue with color shifts in my photos. Many cameras can correct for the type of light... though they never seem to work as well as I'd like. This just lets me avoid the issue. To take my photos all I have to do is clear off some space and my painting station becomes my photo area. I try to position the lights to either side at about 45 degree angles. They're not quite face on, aimed slightly downward but certainly not too high up. You can see my whole setup below. Currently there is some diffuse light coming through the window shade... but most of my photos are done at night so that doesn't play a role.
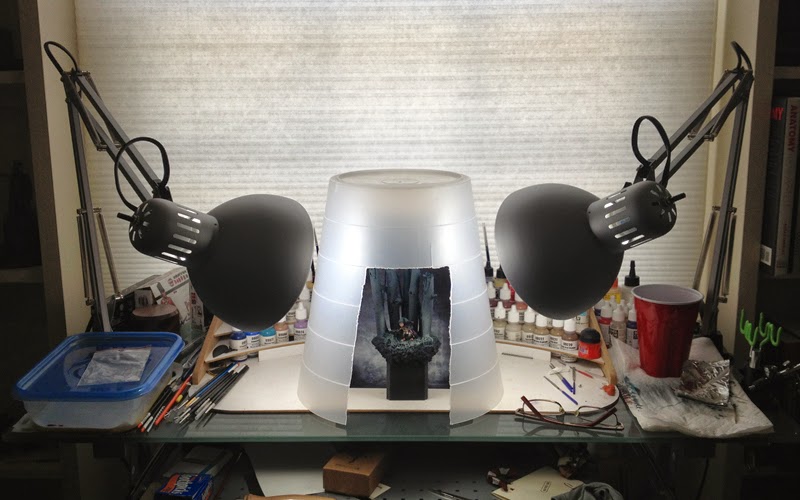
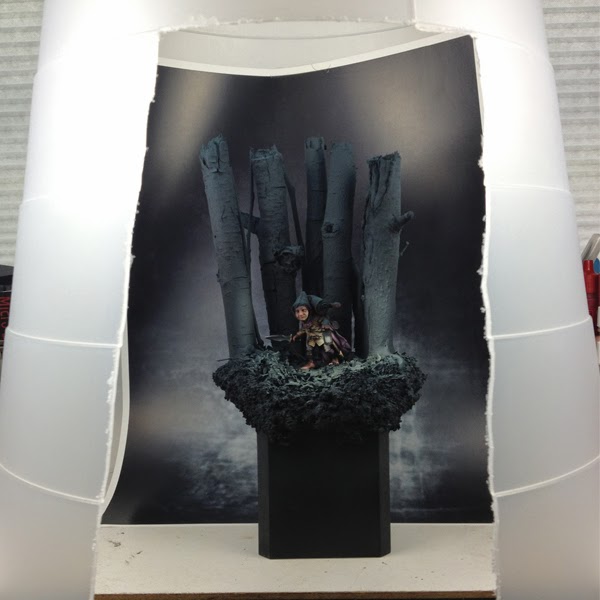
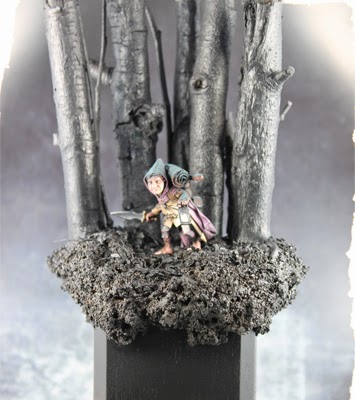
Here you can see a closer view of the figures in the lightbox and how it looks under the lighting conditions. There's a bit of glare on the background but that's not a big deal. I can angle it or adjust the lights if I want. Unlike most of the pictures I post these two were done with my cell phone (iphone 4S... so not even the latest one). No fancy camera tricks. If I were doing this for the mini and not the setup I'd move closer so the phone could get a more focused and crisp image.
Here you can see a closer view of the figures in the lightbox and how it looks under the lighting conditions. There's a bit of glare on the background but that's not a big deal. I can angle it or adjust the lights if I want. Unlike most of the pictures I post these two were done with my cell phone (iphone 4S... so not even the latest one). No fancy camera tricks. If I were doing this for the mini and not the setup I'd move closer so the phone could get a more focused and crisp image.
Okay, last thing to talk about is the camera. Normally I'm not using my phone but a digital SLR (Canon T3 Rebel). There's another good article on MassiveVoodoo where they demonstrate that you don't need a fancy camera for good photos, a simple point and shoot will work almost as well. But, if you've got a DSLR why not use it?
http://massivevoodoo.blogspot.de/201...otography.html
I do most of the photography on auto but there are a few things I do set. For my photos I step back from the model and zoom-in all the way instead of trying to get the camera as close as possible to the model. The lens is 18-55mm, so I'm photographing at 55mm. I think they recommend the same trick for taking people's portraits. The other photo trick I use is to set my camera to auto-bracket. For anyone not familiar with this technique what happens is the camera takes one photo at what it thinks is the correct exposure setting, then one slightly underexposed and one slightly overexposed. Cameras aren't very smart. They don't know whether you're taking a picture of a mostly black room or a bright snowy landscape. They think that everything should average out to a medium grey. So that bright snowy landscape will be underexposed and the black room will be overexposed. Auto-bracketing allows you to take 3 photos and assume one will be the correct exposure. Alternatively you could set the aperture and shutter speed... but that's complicated, at least more than I want it to be.
As an example of why I auto-bracket, here's what the camera thought was the 'correct' exposure for Olfo after I'd primed the base black (and put him in front of a dark background).
Many cameras have an auto-bracket feature though you may have to Google how to set it up (it wasn't in the Canon manual but the feature is there). If you don't have that option then you may have to change your exposure settings yourself or adjust the lights and background brightness to get everything to come out looking like it does in person.
Oh, one last thing about your camera settings. If you're using a tripod, great! No need to worry about an blur from shaky hands. If you're holding the camera you can help limit the blur by increasing the ISO setting (basically the film speed or how sensitive the camera is to light). Careful not to go too high as that can lead to grainy images. I've got mine set to 800 while the camera can go as high as 3200.
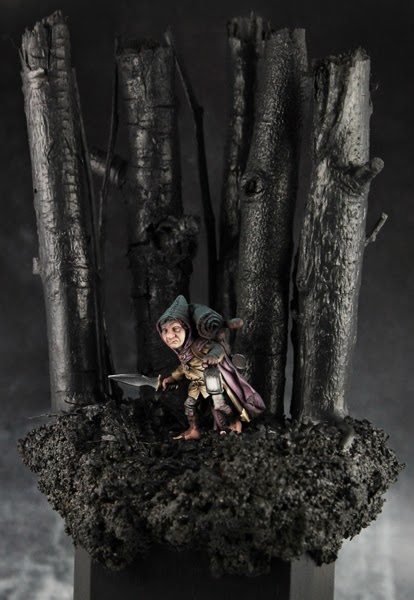
Thanks to the auto-bracketing, lightbox, and daylight bulbs once I take the picture all I have to do is crop and resize the image. Beyond resizing it, there's no need to do any altering of the image on the computer. Remember you really don't need to spend a lot of money on a fancy photo setup. Between the trashcan, the two daylight bulbs, and the cost to print the color backgrounds this ran me maybe $10 or $12. Yes, a fancy camera can help. But with a decent photo setup even my cellphone will give me pictures that look good. No excuses. Go and take amazing photos of your work!
No comments:
Post a Comment
Note: Only a member of this blog may post a comment.