Showing posts with label Historical. Show all posts

Wednesday, July 1, 2026

Flora - Flower Girl Work in Progress (Mildly NSFW)

 Well, it's been quite a while since I've posted anything, but I'm hoping I can get back into the habit of sharing updates here.

I picked up the 80mm Flora model from Golem Miniatures' kickstarter quite a while ago and I've been tempted to start her a couple of times over the years. I was looking for a somewhat straightforward project and decided to finally start on her. I say straightforward because she's got a small-ish number of sections to paint (skin, hair, skirt, sash, flower pot, and flowers) as opposed to sculpts covered in different objects and equipment to paint. And, at this point, I feel pretty comfortable working with skin, hair, and cloth so I didn't foresee any big hurdles I'd have to figure out on this piece. That being said, I still see it as a good piece to learn and practice on. Specifically I wanted to work on nuances with the skin and also work on capturing a more realistic light, working with primary light and cast shadows, ambient light in the cast shadows, and bounce light on various parts of the figure. I'd also gotten the feedback at NOVA last year that on my entries certain areas, like the faces, looked like I'd spent a lot of time on but other areas weren't done to the same standard. I still managed to get golds in Masters Large Scale Single and Bust, but my goal on all my pieces this past year has been to remember that comment and work to have all the parts of the figures be done to the same level of refinement.


Here's the progress I've made over the past 3 weeks or so. For the skin I've tried out some slight changes to my normal mixes. I started with a base of 3:2 Reaper Rosy Shadow and Bronzed Skin. For the shadows I used AK's Dark Rust and some French Greyish Blue. As I worked in mixes from the shadow up to the base, I did add some extra red at about halfway to capture that warm transition in skin as you move into shadow. For the highlights, I used Reapers Bronzed Highlight plus a little AK's Lemon Yellow (to portray a warm primary light), then started to add in some Ice Yellow before finally switching to adding Ivory for the final specular highlights. I then used some glazes of Mindwork's Magenta to add more warmth in the cheeks, chest, and hands.


For the ambient light in the shadows, I worked from the shadow (Dark Rust + a very little French Greyish Blue) up about halfway to the base (3:2 Rosy Shadow and Bronzed Skin). Then I started mixing in a ~1:1 mix of Bronzed Highlight and Grey Blue. The trick here was to avoid getting the skin to be too grey in the darker tones, so staying away from adding too much blue to the skin tones (clearest on the back of the figure). But when I got to the lightest colors, I pushed more of the blue allowing it to turn more grey. However, with the contrast of the warmer shadows and midtones, the desaturated highlights read as cold even though they are mostly grey.


Bounce lights were done with a mix of the base plus some of the shadow, then going into a mix of bronzed highlight and a little grey brown. I plan to go back over these with some glazes to help the bounce light regions reflect the color of the source of that bounce light (as it can vary from place to place on the figure).


As a small aside, I wanted to say again that I find the use of reference photos to be extremely helpful for painting light and shadow (especially cast shadows). Before I start any painting, I'll place the figure under a single light and move it around until I find a light direction that I think works well. I then take pictures of the figure from multiple angles so I can reference them as I paint the piece. Here's one example next to the painted piece. It's helpful to go back to these again as you paint and double check your light and shadow placement. As I spot differences, I'll continue to make adjustments to improve the lighting on the figure.


Wednesday, July 27, 2022

Completed Vesha and Elmer Ellsworth

Rounding up a couple recently finished pieces. First, the most recent, is Vesha from Bold Miniatures. I had a blast working on this bust, just a really fun piece to paint. I started her with the intention of practicing female skin. But this also became a piece for me to focus on painting light. I tried to push myself to be bolder in my use of color in the primary light, working with Lemon Yellow for the highlights rather than just a subtler off white. I also played with adding blue to the shadows, though I know I could have been bolder with the color there. Finally this was the first piece I made a serious stab at painting cast shadows on.


The second finished project I wanted to share was Col. Elmer Ellsworth, a 75mm ACW figure from FER miniatures. I painted this piece as a gift for my dad, a Civil War buff and the person who first introduced me to miniature painting. I tried to take the lessons I was learning from Vesha and apply them on Ellsworth as well. Again I worked with a warm yellow light, which was interesting to paint onto the dark blue uniform. And I worked in cast shadows which you can see on places like his forehead from the hat, his shoulder from his head, and on his leg and shoe from the sword.


Wednesday, December 26, 2018

2018 Year in Review

Well, it seems like a good time to look back at all my painting related work from the past year. This year included a move to a new city, which provided a bit of a disruption from my normal hobby work. Unfortunately my new hobby space is a bit more isolated, so I'm still trying to find the balance between work, family, and painting. Of course we'll be moving to a new place (same city though) in another 3 or so months... so perhaps that setup will end up working a bit better for me. :)

There's been quite a bit of painting though, because I've got some bigger projects in the works, it hasn't resulted in that many 'finished' pieces.  Only three pieces were fully completed this year: a 28mm White Speaker (commission project), a 54mm Knight of the Third Crusade, and a 54mm dwarf (Brom from Enigma miniatures).  The White Speaker, like this post, was a trip down memory lane.  Several years ago I painted the 54mm version of that figure, so it was an interesting project to see how, with more experience, closely I could replicate that work at half the size.

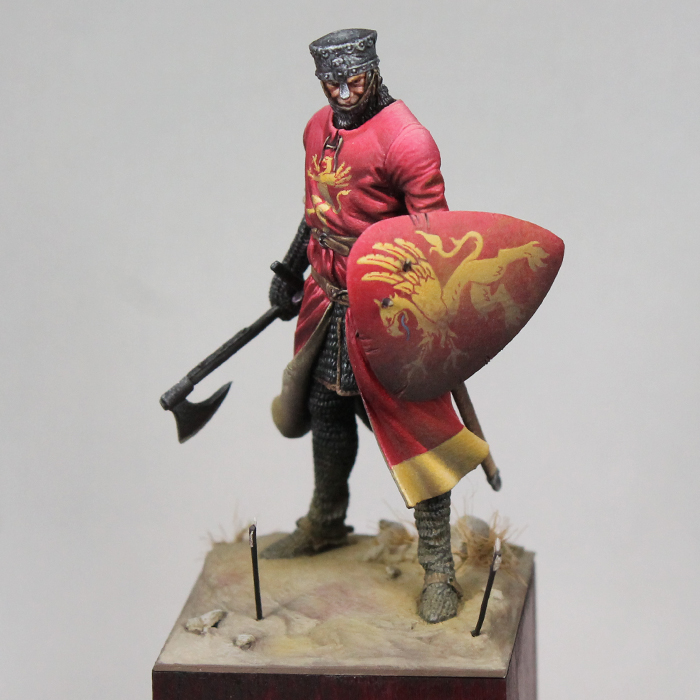
The knight was a really enjoyable project.  I'd had my eye on the kit for a while.  It's a pretty simple figure from Romeo Models, but there was something about it that just stood out to me.  There was plenty of room for interpretation and personalization with the color scheme and iconography.  The piece was also a great project to work on my metallics and my freehand.  It ended up being the subject for two articles in the Illustrated Historical Artist (one on freehand and the other on TMM) and won first place in 'Eavier Metal's 'Eadbanger competition (Master Single Figure category).


The final completed piece was Brom.  I'd wanted to do a relatively quick fantasy project, so I picked up this old 54mm Engima figure from a friend.  As usual, my 'quick' project turned into something much more involved... but it was a piece I definitely enjoyed working on.  The sculpt is pretty unusual.  The figure is wearing a hodge podge of cobbled together armor, much of it corroded.  That, along with the pose, pushed me to come up with a narrative for the figure long before I even started painting.  Although I wanted to keep this a single figure scene, I still worked to tell a story with the piece.  I actually have another article in the works describing that process, though it will likely end up posted online on the FigureMentors site as opposed to in a magazine.  So be sure to keep an eye out for it! ;)

In addition to my finished pieces, I've got a number of projects in various states of completion.  The largest of them is the 3 figure fantasy pirate diorama I've been painting for quite some time. Two of the figures, Barbarela Lord of Mussels and Redghar, were pieces I started in 2015 and 2016! I've had this idea of combining the dwarf with some other pieces, so it's been something that's evolved over time.  Between then and now, I ended up repainting most of the dwarf.  My skills had improved and the orc was noticeably better than the dwarf.  So he needed updating in order to work together.  Those two figures are essentially finished and the third, a monkey, is nearly complete as well.  The base is still under construction (though that's nearing completion), but painting the scene will still be a significant undertaking.  I'd like to take this with me to the Crystal Brush competition, so hopefully I can get it wrapped up in the next couple months!

Another big project was the 75mm Tiefling figure based on Critical Role's Mollymauk. This started out as the Child Thief (aka Peter Pan) from Terrible Kids Stuff. While a neat piece, it never inspired me as much as I wanted it to. But, when I decided to create a figure based on one of the Critical Role characters, it seemed like an ideal piece to convert. So I redid a lot of the detail on the outfit and added the horns and tailed needed to turn him into a tiefling.  It was my biggest conversion by a large margin, but only the beginning of the project.  The character is covered head to toe in design work, so there's been a ton of freehand that's gone into this project.  Still more to do, though he does appear to be nearing completion.  I've got a base already planned for him (thankfully not as complex as the pirate scene).  But it also needs to be built and painted.  I'd like to also get this piece done in time for Adepticon/Crystal Brush, so lots to do and not much time to waste!

In addition to all of those, I've worked on a 28mm figure of Vax (also a Critical Role character) released as a special edition.  It's almost finished.  Just a little work left on the wings and then a small display base to build and paint.

I also worked on a 54mm gladiator from Pegaso.  This was a kit that I've liked for quite some time, but was a bit intimidated by all the armor.  After painting the knight (shown above), I felt a lot more comfortable with my approach to TMM and decided to give the gladiator a go.  While the main figure is mostly finished, I felt he needed another figure to complete the scene.  I picked up a fallen gladiator from El Viejo Dragon, but so far have only base coated him.  Since there's no specific contest I have planned for this piece, it's taken a back seat to some other projects.  But I do hope to return and finish it up shortly after the Crystal Brush.

And finally I did some early work on a 75mm Napoleonic Trumpeteer. Pretty much just focused on the face, so he's in the very early stages.

Aside from the painting projects, I've joined up with a new painting group in San Jose (at the Game Kastle in Mountain View).  They're a great group of painters and have quite a few people who are focusing on display painting (and larger scale pieces) and pushing themselves to improve their abilities.  It's definitely been a highlight to get to interact and paint with them on a weekly basis.

Looking ahead to 2019, I've made plans to attend Adepticon after missing the last two years.  I'll be teaching two workshops on painting faces and skin plus a demonstration for freehand.  A little closer to home, I'll be repeating the faces and skin class at KublaCon in the bay area.  I've also got a weekend workshop at Game Kastle planned for July, though we are still working on the details.

All in all, it's been a productive and fun 2018.  And I'm definitely looking forward to what 2019 has to bring.  I should be able to finish off a number of big projects and I can't wait to get back to teaching some classes!  I hope all of your 2018s were just as memorable.  And I look forward to seeing what projects everyone else will be working on in the coming year.

Sunday, November 4, 2018

Trumpeteer Major Part 1

Well, it's been a while since I've updated this blog.  I haven't had as much time to paint as I'd like and, when I had the time, it seemed like I wasn't making enough progress on anything to make it worth posting.  I think I've been in a painting funk for a bit.  Got a bunch of projects, but some just aren't inspiring me at the moment and others seem stuck, where I might know what I want to do but just can't quite figure out how to do it.  I spent some time thinking, trying to figure my way out of the funk.  I came to the conclusion that the best thing was to just start a new project.  Something without any big plans or complicated ideas, just something I could have fun with and recharge my painting mojo.

I settled on a 75mm Napoleonic figure from Pegaso.  Historicals are comfortable for me and I love the colors and details on Napoleonic pieces.  This won't exactly be an 'easy' figure.  The colors are primarily white, red, and metallic gold lace.  But looking ahead, I don't see a part of the project where I anticipate getting stuck if that makes sense.

I built and primed him on Saturday.  Got about an hour of painting in that night to do the base coating and initial shadow sketch.  Then had another couple hours on Sunday while the little on napped to try and finish the face.  Also on my mind is my upcoming workshops at Adepticon.  I'll be teaching a two sessions of a class on faces and skin.  So while I was working on this figure, I took pictures are each step along the way.  I'm planning to put together a handout for the class to supplement my demo and lecture.  So I expect I'll use this figure as part of that write up.  Anyway, here s how he began (basecoat only) and how the face wound up.

Something I've discussed in tutorials and will include in the class is the use of glazes to finish the work on faces and skin.  It's a subtle step, yet I think it really helps capture a more realistic look.  So I like to show these side by sides.  On the left, the face after all of the shading/highlighting.  It looks fine, but compare it with the image on the right (after glazes) and I think you'll agree the right looks much more life-like.

Tuesday, September 11, 2018

Gladiator Part 4 and Vax

I spent some time last night working on the chain mail for the gladiator.  Not quite right, but it's getting there.  I'm sure I'll spend a while messing with it to see if I can get to a stage where I'm happier.  I'm fairly pleased with the back.  I think the lights bring out the shape.  The front is a bit flatter, so I feel like the effect isn't that interesting.  I'd like to try and do a bit more with the shine.  And of course I still have the mail on both of his shoulders to deal with.

In other news, I've started on another project, the 28mm Vax figure from Steamforged Games.  This is a character from a web show, Critical Role, and was released during Gencon as a limited edition figure.  Luckily for me, it was also available online up until the convention, so I was able to get a copy as well.  This is still in the early stages and so far I've just focused on the face.  It really makes me miss doing 54mm and larger faces.  Those 28's are tough!  A good reminder why I like working on the larger scales. =)  I got the impression that a lot of people who follow the show have bought either this mini or their kickstarter set.  From comments I've seen on Facebook and elsewhere, it sounded like there were a decent number of first time painters too, so I decided to write a very thorough tutorial on this figure.  It's already up in the tutorials section of this site.  I'm adding sections to it as I go.  My goal is to provide enough information so that a beginner could work through the piece, so expect to see a lot of detail on the entire process.  For those of you with more experience who still want to check it out, I recommend skipping down to the bottom where I start to get into the painting itself.  I recorded a couple videos as I did the face.  Unfortunately the part where I did the blending did not record properly, so that part is just text.  But the rest, where I setup my shadows, do the eyes, and paint the glazes did manage to record properly.


Friday, September 7, 2018

Gladiator Part 3

I'm trying to wrap up the non-metallic sections on this guy.  I continued on with the legs, painting the linen covering behind the greaves, the leather of his feet, and the feet themselves.  I then moved onto his right arm, dealing with the leather and wraps there.  I still need to paint the wraps on the back of the greaves, along with some small leather details on his armor, but that about does it.

I've also sketched on the metallics for the sword, just trying to get the light/shadow placement how I like it. As with the armor, though I'm using metallic paints, I am still approaching it as if I were pointing NMM. I want more control over how the light looks on the sword, so I'm forcing the shine and shadow to be where I want. I still need to blend it (though lighting for the photos makes it look smoother than it is) and add a few top level highlights.  After that I'll have no more excuses to avoid the dreaded chainmail! =)


This weekend I'm hoping to stop by my storage unit. I've got some old kits in there and I think I can scavenger parts from one to make a dead gladiator for the base. It's going to require a bit of sculpting (though just the body, the head and limbs I think I can use). So we'll see how it turns out. I'm hoping it'll be good enough to use, otherwise I'll just do a more traditional arena style base for him.

Friday, August 31, 2018

Gladiator Part 2

I'm continuing to make progress on the gladiator.  Quite a bit more work on the armor.  I've got a little more to do on the geaves, but that's about it.  I also started a bit on the white metals, doing some of the details on the cuirass.  However they still need a bit of work.  After all that metal, I needed a break before tackling the chainmail.  So I working on the cloth and skin.  I initially based his clothing in blue, but the color just didn't work for me.  I decided to switch to a pale purple instead, which is a complementary color to the yellow metal.  I could have gone brighter on the purple, but those dyes were extremely expensive in ancient time.  So pale seemed a bit more realistic to my mind.


Here's a look at how the figure has progressed.  You can see the stages for the cuirass.  I begin with a dark base (metallics work best over a dark case), in this case purple as it contrasts with the yellow metal.  Then I do a sketch with metallics to help me figure out placement of the lights and darks (middle image).  This involves about 5 shades (base, 2 shadows, 2 highlights).  It's quick, without much attention to blending.  I just want to see how it looks and then I can make corrections to shadow and highlight placement as needed.  At this stage the armor looks decent, but it looks even better after I go in to refine it (right image).  I sharpen up the shadows, going to pure black, and further extend the highlights (using Citrine Alchemy from Scale75).  I also mix a number of intermediate shades and blend everything together.  Stippling is used in parts to help with the blends while also adding some texture.  You can see from a comparison of the middle and right images that the final result looks sharper and a bit brighter too.
This set also gives you a nice look at the difference between the base coated cloth/skin and the finished version.