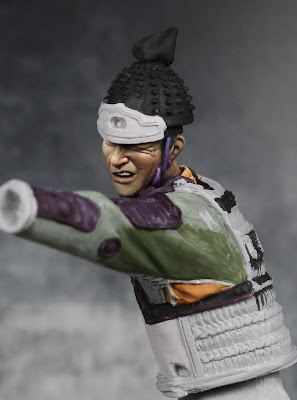
This past week I began work on the samurai I teased a few posts ago. I'm happy with the progress but this is just the first few steps in what promises to be a long long project. I began with the face. I switched up my usual skin mix, this time I used Volcano Brown, Bronzed Skin Shadow, Bronzed Skin, Bronzed Skin Highlight, and Linen White. Over that I applied glazes of red, blue, and purple ink (from the Scale75 set).
My approach to painting the face was mostly what I've described in the past and on the tutorials section. Of course as a 90mm figure there's more room to work on the details and expression, so I spent a lot more time on it. A large part of the process is, after getting all the basic shadows and highlight in, closely evaluating the face from different angles and determining what works and what doesn't. A line or shadow might look fine when viewed from the front, but doesn't work from the side. I do this on all figures, but I spend a lot more time doing it on these larger faces. I did a number of revisions like the area next to his right eye and the lines down from the nose, and the chin. The face is going to be a focal point, so it's worth continuing to work on it until you're satisfied. Once I was happy with what I had, I then did the glazing and final retouching of highlights.


There's a lot to this figure and the whole thing will be a multi-step process. Once I get the bulk of his torso finished, I'll add his other arm. It crosses in front of his chest, so it blocks access to the face and torso. When I finish the sleeves and his back I'll be able to add the armor plates on his shoulders. I'll need to paint those before I can add the rest of the helmet. Then there's the lower body armor and stuff that will go on top of that (swords, quiver, and more straps/ropes). Here's a look at the pieces still remaining, as you can see there are quite a few.

No comments:
Post a Comment
Note: Only a member of this blog may post a comment.